Easy Instant Pot BBQ Ribs
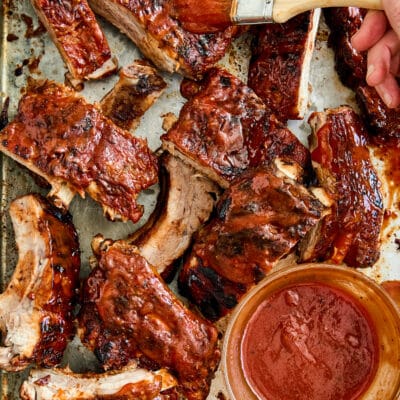
Fall-off-the-bone BBQ ribs! The easiest ribs you will ever make right in the Instant Pot in just 25 minutes. So saucy, so sticky, so tender!
Ingredients
- 1 tablespoon brown sugar
- 2 teaspoons kosher salt
- 2 teaspoons onion powder
- 2 teaspoons chili powder
- 2 teaspoons ground mustard
- 1 ½ teaspoons smoked paprika
- 1 teaspoon dried thyme
- 1 teaspoon dried oregano
- 1 teaspoon garlic powder
- 1 teaspoon freshly ground black pepper
- ¾ teaspoon ground cumin
- ½ teaspoon cayenne pepper
- 2 pounds baby back pork ribs, trimmed of excess fat, rinsed, and patted dry
- 2 cups chicken stock
- ½ cup apple cider vinegar
- 2 cups barbecue sauce
Equipment
Instructions
- In a small bowl, combine brown sugar, salt, onion powder, chili powder, mustard, paprika, thyme, oregano, garlic powder, black pepper, cumin and cayenne pepper.
- Remove the membrane from the underside of the ribs, pulling it down the entire length. Season ribs with brown sugar mixture, rubbing in thoroughly on both sides.
- Add chicken stock and apple cider vinegar to a 6-qt Instant Pot®. Place metal trivet into the pot. Place ribs upright on top of the trivet, wrapping in a circle.
- Select manual setting; adjust pressure to high, and set time for 25 minutes. When finished cooking, allow a 10-15 minute natural release before a quick-release pressure according to manufacturer’s directions.
- Preheat oven to broil. Line a baking sheet with foil.
- Place ribs, meat side up, in a single layer onto the prepared baking sheet; brush with barbecue sauce.
- Place into oven and broil until barbecue sauce is caramelized and browned, about 4-6 minutes.
- Serve immediately with remaining barbecue sauce.
Notes
- Remove the membrane. Removing the membrane will ensure that the ribs are tender and flavorful. If left on, the membrane can be tough and chewy when cooked, while also preventing the rub (and BBQ sauce) to penetrate the meat properly throughout the cooking process.
- Start with a dry rub. A dry rub is ideal for ribs for that flavorful crust without adding too much moisture, sealing in the juices and preventing the ribs from drying out.
- Brown sugar is key. The brown sugar does not make these ribs overly sweet. It will add a subtle sweetness, while also caramelizing and adding moisture to the ribs, keeping the ribs tender and juicy.
- Use baby back ribs. Spare ribs can be used, but baby back ribs is generally preferred as they are tender and leaner, and cook much quicker than spare ribs.
- Use a metal trivet. Using a metal trivet will help keep the meat elevated, preventing any kind of sticking or that dreaded "burn" error. This will also allow for better steam and liquid circulation, ensuring more even cooking and tenderness of the ribs.
- Natural release first. A natural release will yield ultra-tender, fall-off-the-bone ribs (and avoids messy splattering!).
- Broiling is optional but highly recommended. Broiling is an additional step, but so worth it. With an extra brush of BBQ sauce, the broiling process helps create that favorited crisp, caramelized crust without burning. But be sure to keep a close eye on it - it caramelizes quickly!
- Reheat in the oven. Leftover ribs can be rubbery and tough when reheated. For best results with leftovers, a low, slow oven is the way to go to prevent the ribs from drying out. Let the ribs come to room temperature first (about 15-20 minutes), then reheat in the oven at 250°F, covered in aluminum foil until warmed through.