
Baked Parmesan Zucchini
This post may contain affiliate links. Please see our privacy policy for details.

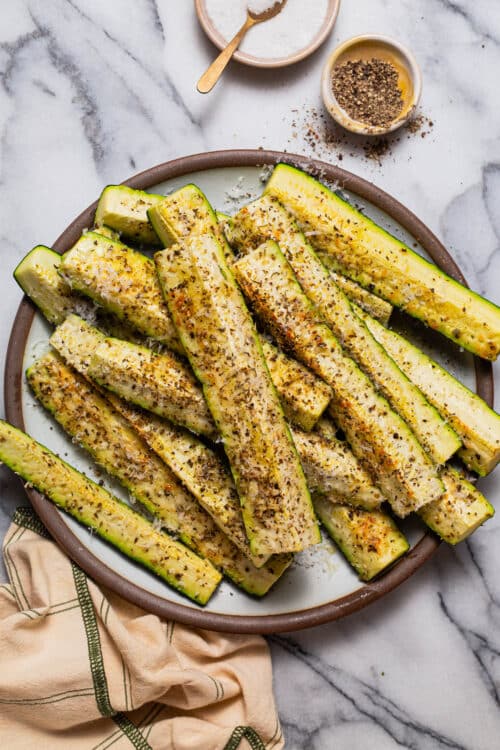
Crisp-tender zucchini sticks with an irresistible Parmesan topping! The perfect side dish to sneak in veggies for both kids and grown-ups.

Featured Comment
Why you’ll love baked parmesan zucchini
- Great way to use up zucchini. Already made zucchini bread with your summer bounty? Time to whip up some parmesan zucchini sticks, the most perfect side dish (or appetizer) to elevate any meal.
- Completely baked, start to finish. There is absolutely zero frying or sautéing here. The zucchini spears are completely baked, sprinkled with a simple Parmesan-herb coating, and broiled the last few minutes for that nice golden brown crust.
- Kid-friendly. These parmesan zucchini sticks are such a great, low-carb alternative to french fries, providing so much more fiber and nutrition. It’s truly the best way to sneak in some veggies for kids and grown-ups!

How to cut zucchini into sticks (or spears)
Slice the zucchini into even spears every single time, ensuring they brown and cook evenly.
- Wash under cold water to remove dirt and debris, using a kitchen towel to dry thoroughly.
- Trim the ends, both the stem and the base, about 1/2-inch on each side.
- Cut the zucchini crosswise (horizontally) into two halves.
- Cut each half into two or three equal pieces, depending on how big the zucchini is.

How to make baked parmesan zucchini
- Cut the zucchini. Cut the zucchini into even sticks or spears (instructions above), cutting as long or as short as desired.
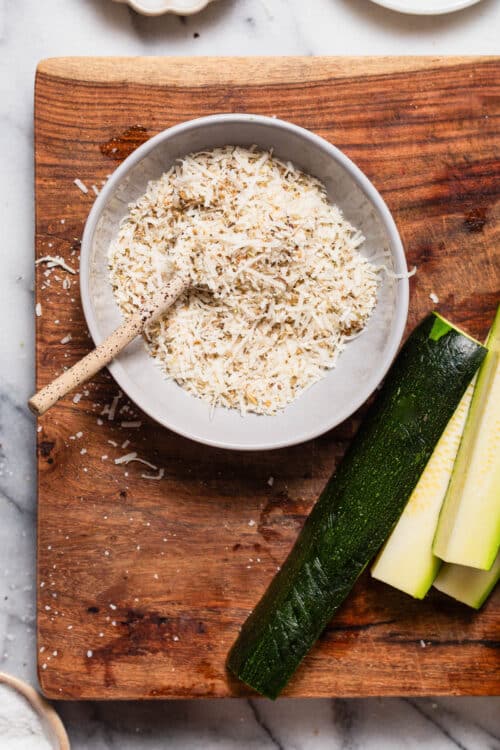
- Make the Parmesan mixture. Toss together the Parmesan, thyme, oregano, basil, garlic powder, salt, and pepper. Freshly grated cheese is best here for that favorited crispy golden-brown crust as pre-shredded cheese can clump and burn easily.
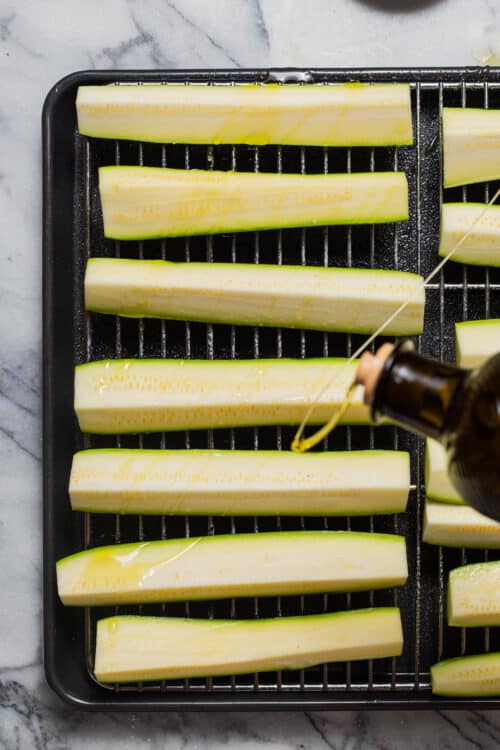
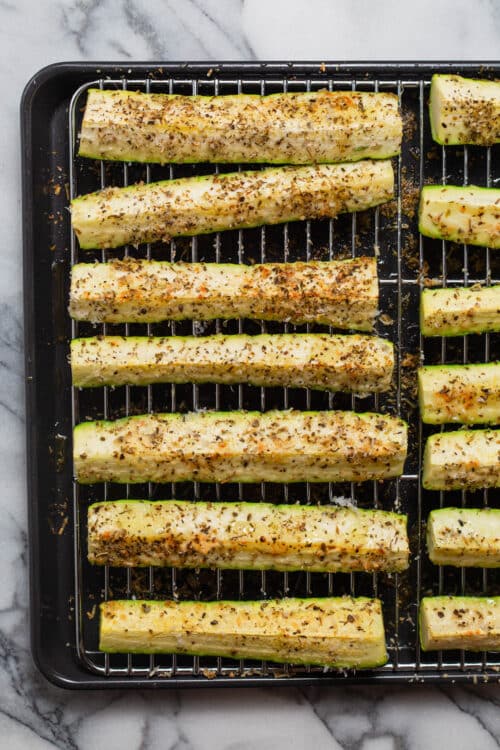
- Coat the zucchini. Place the zucchini sticks in a single layer on a wire rack inside a baking sheet, leaving a 1/2-inch space between each stick. Drizzle with olive oil, sprinkling the seasoning mixture in an even layer on top.
- Bake and broil. Bake the zucchini until tender. Pro tip: broil the last few minutes of cook time for that crispy crunch and golden brown crust.
- Serve. Serve warm with additional Parmesan.
Pro tip
Use a cooling rack on a baking sheet.
- Prevents soggy zucchini. When zucchini is baked directly on a sheet pan, it will often steam in its own moisture. Elevating the zucchini on a cooling rack will allow for even air circulation.
- Uniform browning. The rack will ensure golden browning on all sides of the zucchini sticks.
- Allows for easy clean up. Line the baking sheet with aluminum foil (under the rack) to catch any drippings or fallen seasoning for the easiest clean up ever.

Baked Parmesan Zucchini: Frequently Asked Questions
A medium zucchini is typically 6 – 8 inches long, 2 inches in diameter, and weighs around 6 ounces.
No, leave the zucchini peel intact as it provides strong structural support, allowing the zucchini to hold its shape during baking. Removing the peel will make the zucchini soft and mushy.
Zucchini is 95% water, the common culprit behind soggy, limp zucchini. For crisp-tender zucchini, dry the zucchini thoroughly and bake on a wire rack over a baking sheet to ensure even air flow and to prevent steaming.
Parmesan zucchini is so versatile and can pair well with your favorite dipping sauces such as Ranch, fry sauce (burger sauce), garlic aioli, or marinara sauce.
Yes! The air fryer is a great way to get crispy zucchini sticks. Add the zucchini sticks in a single layer in the air fryer basket and cook at 400°F for 8-10 minutes, shaking halfway through.
Zucchini sticks are best when served immediately, but leftovers can be stored in an airtight container in the fridge for 1-2 days, reheating in the oven at 375°F until warmed through.
Freezing is not recommended here as the texture may become mushy upon thawing.


Baked Parmesan Zucchini
Ingredients
- 4 medium zucchini, quartered lengthwise and patted dry
- ½ cup freshly grated Parmesan
- ½ teaspoon dried thyme
- ½ teaspoon dried oregano
- ½ teaspoon dried basil
- ¼ teaspoon garlic powder
- Kosher salt and freshly ground black pepper, to taste
- 2 tablespoons olive oil
- 2 tablespoon chopped fresh parsley leaves
Instructions
- Preheat oven to 400 degrees F. Coat a cooling rack with nonstick spray and place on a baking sheet; set aside.
- In a small bowl, combine Parmesan, thyme, oregano, basil, garlic powder, salt and pepper, to taste.
- Place zucchini onto the prepared baking sheet. Drizzle with olive oil and sprinkle with Parmesan mixture in an even layer.
- Place into oven and bake until tender, about 10-15 minutes, flipping halfway. Then broil for 2-3 minutes, or until crisp and golden brown.
- Serve immediately, garnished with parsley, if desired.


Equipment


Notes
- Dry thoroughly. Zucchini has a very high water content. Pat the zucchini dry with paper towels before baking to guarantee that crispy exterior.
- Cut into uniform pieces. Cut the zucchini into similar-sized sticks to ensure even cooking and browning.
- Freshly grated Parmesan goes a long way. Pre-shredded cheese contains anti-caking agents, burning easily and leaving a meal crust. Use freshly grated cheese for that crispy, golden, flavorful crust.
- Use a cooling rack on a baking sheet. No more soggy limp zucchini! Baking the zucchini directly on an oven-safe cooling rack inside a baking sheet will prevent steaming and provide even airflow with easy clean up.
- Don’t overcrowd the pan. Space the zucchini sticks out in a single, even layer, about 1/2-inch, for proper browning. When the pan is crowded, the steam will get trapped between the sticks, causing the zucchini to steam instead.
- Make it in the air fryer. These can easily be cooked in the air fryer at 400°F for 8-10 minutes, shaking halfway through.
- Reheat in the oven. Leftover zucchini sticks can become mushy when reheated in the microwave. For best results with leftovers, reheat in the oven (to regain some of its crispness) at 375°F until warmed through.
Did you make this recipe?
Tag @damn_delicious on Instagram and hashtag it #damndelicious!
All keen to make & eat; Yummo!
Thanks
These say to serve right away, but I was wondering if they would be good to chill and serve at a later time? I’m looking for something to take to a potluck and these look and soud amazing.
This is really best when served immediately, but as always, please use your best judgment.
I reheated a few the next day in a pan and they tasted good, but they really were best right out of the oven.
Although this looks like a great recipe I would like to point out that it is NOT vegetarian. Parmesan is not a vegetarian cheese as calf rennet is used in its production.
I don’t like zucchini. Could this be made with cucumbers instead?
Unfortunately, without further recipe testing, I cannot answer with certainty. As always, please use your best judgment.
I always need more veggies around the holiday season, to offset all the cookies. These look divine!
Great Idea! We have a generous gift from a friend of GIANT zucchinis that don’t fit in our fridge so know we know what do to with them. Thanks! 😀
Hi, I just stumbled on to your site and I love it! I’m a single Sr. citizen, living alone and some of these vegetarian recipes are so easy I might just be persuaded to try them! I recently made a Crockpot full of Calico Beans. It turned out a bit too sweet (with brown sugar & molasses…), do you have a version of this? Thank you for your work to produce this. I appreciate it!
Gale Green
I do not have a recipe for calico beans at this time, but please feel free to browse through the recipe index for more recipes!
OMG this is the best summer squash recipe EVER! I had a couple of pre-sliced fresh zucchini/yellow squash packages that needed cooked today. I made the delicious cheese/herb mIx, pre-heated the oven to 450, spread the squash slices on a large grId rack over a cookie sheet, sprayed them with olive oil spray, then liberally sprinkled with the cheese mix. Baked in the upper part of oven and they were PERFECT after approx 18 mins. (check after 10). Did not need to broil. Served this with organic butternut squash ravIoli and got rave reviews from family/guests. Thanks so much for sharing the recIpe! I must check out your others.
I made the Zuchinni last night and just followed your directions. They were fabulous! My husband loved them. It’s not difficult, just mix all of the ingredients, I even used dried parsley. Then I oiled the Zuchinni with a pastry brush and daubed each one in the topping which, after combining in a small bowl, I put on my cutting board. So easy, so tasty. We Americans tend to over cook our vegetables, so just check them after 10 minutes to see how done the are, then pop them under the broiler for a few minutes. Thanks for the great recipe!
Reply requested.
Love your dogs also.
Dear Chungah,
We have dentures. Is it ok to mix all ingredients and then place on a cookie sheet with parchment paper? It is hard to do crisp with dentures. I have made this several times by this method and it turned out wonderful, but one time it came out like glue on the topping. Maybe a higher temp. or longer cooking time? They are in the oven right now. Looking forward to your answer. Love all your recipes, especially the shrimp ones. Love you and your wonderful recipes.
Lyssa, unfortunately, as someone who does not wear dentures, I cannot really answer with certainty. However, I can say that the zucchini is not as crisp as something like potato chips. There’s still a tenderness to it as you bite through.
These look very good. Can you make them in the microwave?
This recipe is really best suited to be made in the oven.
I just made these. So delicious! Better than any fried zucchini ever! I even snuck in a little paprika because that’s just how I roll. I’m on Atkins and these are a great lower carb side that really satisfies.
Thank you for the wonderful recipe!
I’m obsessed with zucchini. Love it here, there and anywhere. Just made your recipe. I followed it exactly and my zucchini look great! Can’t wait to dig in.
Thank you so much for sharing this delicious recipe. It has become one of my favorites! It is ever better the second day should you have leftovers (I make a ton just so I have more for a few nights 🙂 )! No problem with sogginess here, I bake them for about 15 minutes (a little less if I have the oven at a higher temp) and broil for about five. The leftovers I toss in the microwave for about 45 seconds and then broil for about three or four minutes in a preheated oven. Thanks again!!
I saw a few people posted about their zuchinnis turning out soggy, I myself have experience this before as well. I prefer grilling it the best, but when I do use the over to bake them it does indeed work best to use a cooling rack while baking, and on top if that I like to salt the zuchinnis and let them drain before hand (1-2 hours) to avoid sogginess. Thank you for posting this simply, yet yummy side dish!
Dear Chungah … Thank You for sharing this delicious recipe… I tried it out last weekend and even my “zucchini hating daughter” was excited… I translated your recipe into german and made a post about it … of course with backlink to Your blog … you can have a look here: http://bit.ly/1BTFpOL … I will annulate the post, if this is not okay for You, but I hope it is.
Greetings from Austria
Birgit
haha… I should better first think, than type… “annulate” is the very wrong word… “cleanup” was the word I thougt about…. 😉 Birgit
I made this tonight and served it instead of pasta with a homemade marina and a little fresh basil as a garnish. Delicious, and my husband didn’t even miss the pasta. It took a little longer to cook, and I did put it under the broiler for a couple of minutes at the end. Wonderful recipe! Chungah, you do a wonderful blog and BEAUTIFUL pictures.
I honestly did not know that there was that many dumb people in this world until I read the comments. Chungah you have a heart of gold for answering all these dumb questions, people read the recipe before you try it and if you change all the ingredients don’t bother commenting.
Well spoken my sentiment exactely.
I have made this several times, and though while good, it as never turned out crisp. Tonight I had my husband put it on the Green Egg while grilling chicken. It was finally crisp and perfect!! Yum, yum!