
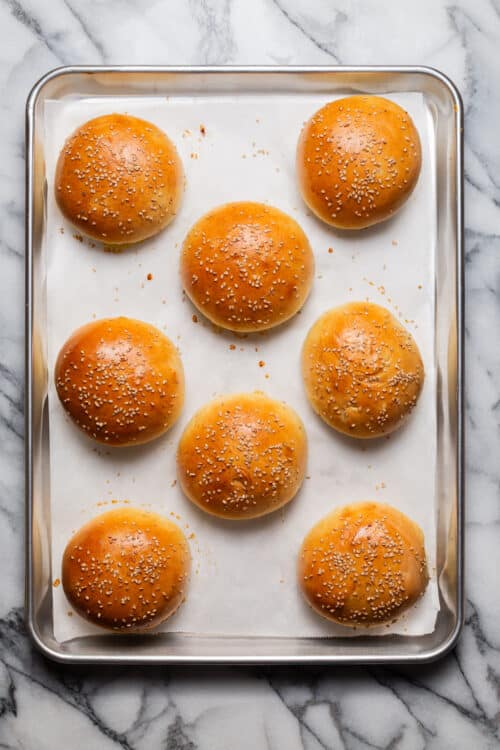
Homemade Hamburger Buns (Light & Fluffy)
This post may contain affiliate links. Please see our privacy policy for details.

THE BEST (and easiest) buns! So soft, pillowy and airy, perfect for any burger or sandwich. You’ll never want store-bought buns ever again!

Featured Comment
why you’ll love this hamburger bun recipe
- Easy and simple to make. Hamburger buns are easy and simple to make. The recipe is straightforward and does not require too many ingredients.
- Minimal hands on time. We’re talking 15-20 minutes of actual hands-on time here.
- So versatile. These homemade buns are not just epic for cheeseburgers. They are equally amazing for any sandwich – fried chicken sandwiches, club sandwiches, BLTs…you name it.
- Holds up very well. These are the type of pillowy buns that will hold up everything so well without falling apart (think saucy bbq pulled pork and sloppy joes!).
- Freezer-friendly. Did you know hamburger buns can keep in the freezer for at least 2 months? Perfect for a rainy day and all your future sandwich needs.

Tips and tricks for perfect burger buns
- Check for expired yeast. When using expired yeast, the buns will not rise appropriately, resulting in dense, flat, heavy burger buns.
- Avoid over-flouring. Adding too much flour will also lead to dry, dense buns.
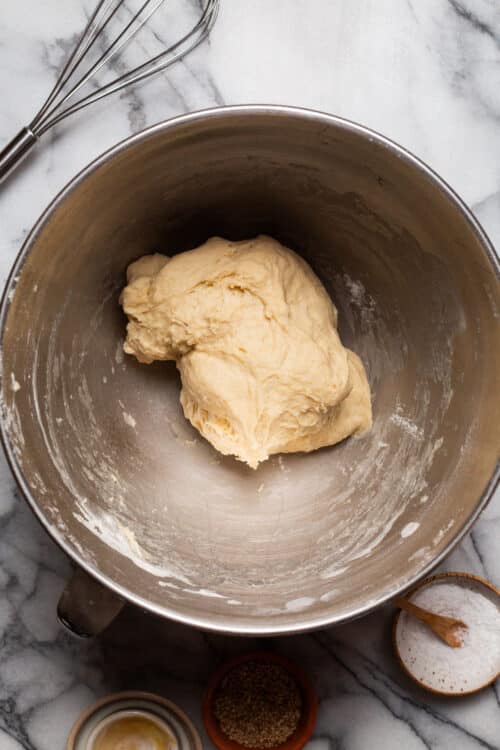
- Slightly tacky feels like a Post-It note. The dough should feel slightly tacky, similar to the back of a Post-It note. These are signs of good gluten development.
- Use an egg wash. Applying an egg wash before baking will yield that glossy, golden-brown finish (and will also help those sesame seeds adhere to the tops).
- Make it whole wheat. Swap out half of the all-purpose flour for whole wheat flour while keeping the rest of the recipe the same. The texture will be a little more dense and heavy compared to using only all-purpose flour but will be equally amazing.

freezing and storage
Storage
Leftover burger buns can be stored in an airtight container at room temperature for 2-3 days.
Reheating
Homemade hamburger buns can be reheated in the toaster oven or in the oven at 350°F, covered in aluminum foil, until warmed through. For a crispy finish, they can also be toasted on a hot buttered skillet, cut side down, for 2-3 minutes. Leftover burger buns reheated in the microwave can lead to soggy, chewy buns.
Freeze after baking
Let the burger buns cool completely. Wrap each bun in plastic wrap before transferring the buns to an airtight, resealable freezer bag. Label, date and freeze up to 2 months. To reheat, thaw at room temperature for 1-2 hours or reheat in the oven (directly from frozen) at 350°F, covered in aluminum foil, until warmed through, about 5-10 minutes.

what to serve in homemade hamburger buns
Homemade Hamburger Buns (Light & Fluffy): Frequently Asked Questions
The dough should be soft, tacky, and slightly sticky, similar to the back of a Post-It note.
This can be due to a few various factors such as kneading too much, over flouring, or not letting them rise enough.
Brush the tops of the buns with an egg wash immediately before baking for that favorited glossy, bakery-style look.
Homemade buns can be stored in an airtight container at room temperature for 3 days. Storing in the fridge can cause the buns to dry out.
Absolutely! For long term storage, cool the buns completely, slice the buns prior to freezing, and wrap each bun in plastic wrap before storing in an airtight, resealable freezer bag for at least 2 months.

Homemade Hamburger Buns (Light & Fluffy)
Ingredients
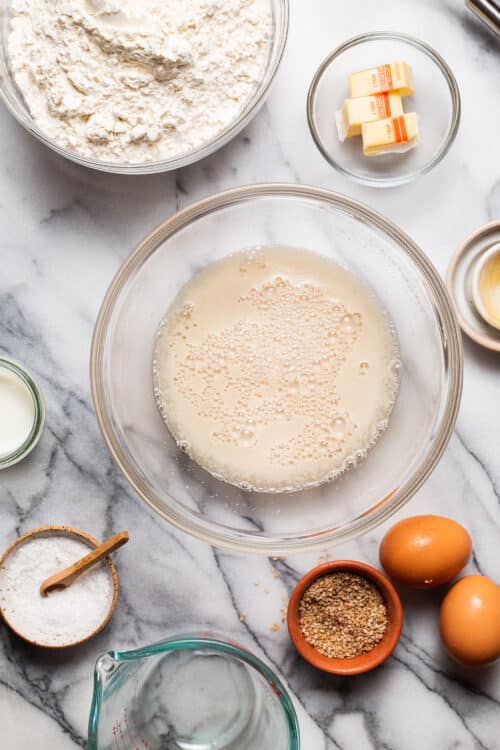
- ¾ cup warm water, 100-110 degrees F
- 3 tablespoons sugar
- 2 ¼ teaspoons active dry yeast
- 3 tablespoons unsalted butter, at room temperature
- 2 large eggs, at room temperature, divided
- 3 ¼ cups all purpose flour, divided
- 1 ¼ teaspoons kosher salt
- 2 tablespoons milk
- 1 tablespoon sesame seeds
Instructions
- Combine water, sugar and yeast in a small bowl; let stand until foamy, about 5 minutes.
- In the bowl of an electric mixer fitted with dough hook attachment, beat the water mixture, butter, 1 egg, 2 cups flour and salt on medium-low speed until a smooth batter forms, about 1-2 minutes.
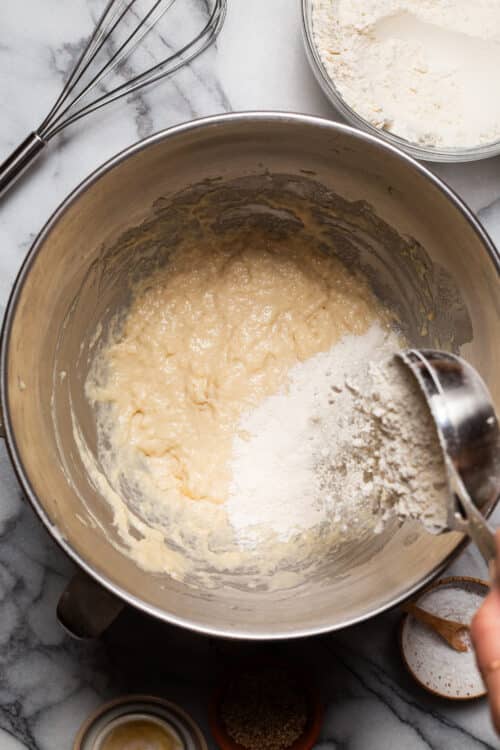
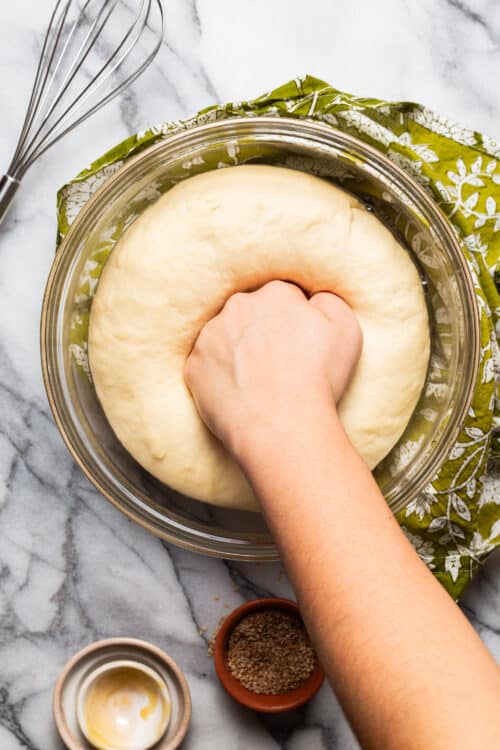
- Gradually add remaining 1 1/4 cups flour, 1/2 cup at a time, until a soft, smooth ball of dough is formed. The dough should feel elastic and slightly tacky to the touch. Increase speed to medium-high and beat for 3 minutes.
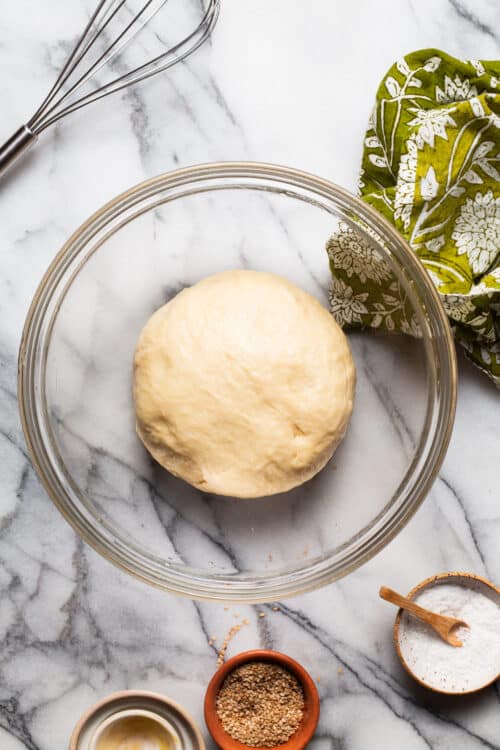
- Lightly oil a large bowl or coat with nonstick spray; place dough in bowl, turning to coat. Cover with a clean dishtowel and let stand in a warm spot until dough has doubled in size, about 45 minutes to 1 hour.
- Gently deflate dough by punching down.
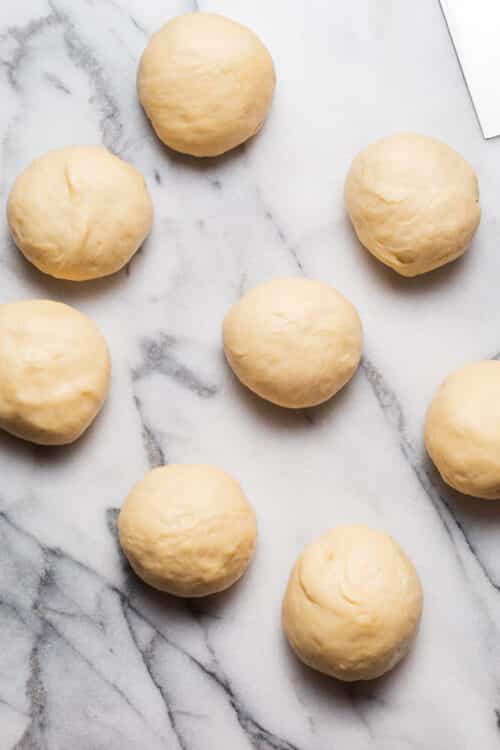
- Working on a lightly floured surface, divide into 8 equal pieces, weighing the pieces as needed; shape each piece into a smooth ball.
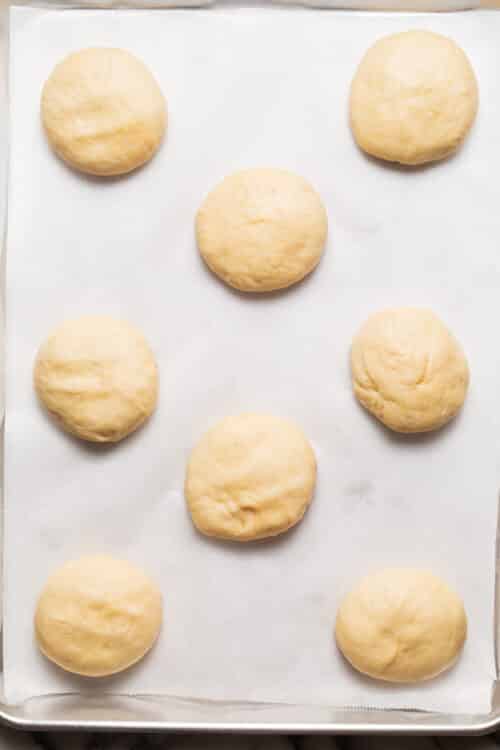
- Line a baking sheet with parchment paper. Place rolls onto the prepared baking sheet; flatten each ball to 3 inches.
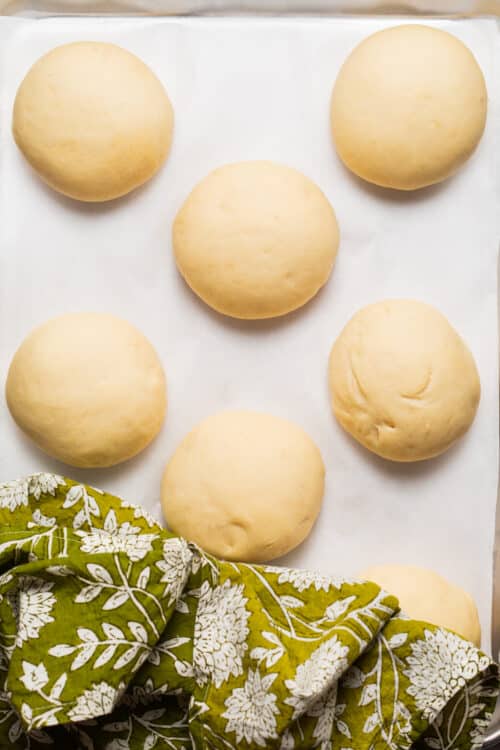
- Cover with a clean dishtowel and let stand in a warm spot until dough has doubled in size, about 45 minutes to 1 hour.
- Preheat oven to 375 degrees F.
- In a small bowl, whisk together remaining egg and milk. Brush tops of dough with egg mixture; sprinkle with sesame seeds.

- Place into oven and bake until golden brown, about 15-18 minutes.


Equipment


Did you make this recipe?
Tag @damn_delicious on Instagram and hashtag it #damndelicious!
Can this be made in a bread machine? Thanks. I am a fan of you and your great recipes!
These look great, but have not made them yet. I have the same question as Ann. Can this be done with a bread machine? I’ve never made “bread” any other way. So if anyone knows how to adapt this recipe to a bread machine, I’d really appreciate some help with it! Thanks!
Can this recipe be pared down? I hate buying 8 packs of buns from the store as there are only the two of us. Before I can eat that many burgers / sandwiches, they start to go bad.
Halve the recipe =)
I’m no expert but many bread and roll recipes you can shape the rolls and then freeze them before the second rise. Then you let them sit on the counter to thaw/rise when you’re ready to bake them. Caveat: I have done this with other bread recipes successfully but have not tried with this one!
Well….they do look fantastic and maybe I will even give it a go in the near future. Thanks for the posted recipe.
Chungah – How do you get your burger buns that lovely golden color? Mine are always so pale after they are baked the correct amount of time.
These buns are delicious! My husband thinks I’m a wonder in the kitchen because of your recipe Chungah. The only problem now is that we can’t go back to store bought hamburger buns!
The golden color comes from the egg wash. In the past I would skip this step and now I know that it really does make a difference. Give it a try and you’ll see!
I used regular salt instead of KOSHER Salt and their is no difference. The only difference is that the salt might be cheaper since I do not have to pay someone to make the salt KOSHER
Louise,
“Kosher” salt refers to the coarseness of the grain. Kosher salt is superior in the kitchen, and at the table, because it’s irregular shape causes it to melt at a different rate than table salt. Though, I hardly think that “taste” in the kitchen is all that you’re missing. Your comment benifits neither the recipe, this blog nor the world. Please keep your small minded comments to yourself.
*I rated this recipe as good, I’ve not yet had the chance to try it but all the components look good and this weekend’s spring like weather calls for burgers and homemade buns. I felt compelled to respond to the misinformed and tasteless comment by Ms. Louise above.
I did the same for the rating but just had to thank you for your epic response. Well done.
Really good recipe. Only two of us, but we love sliders and these are perfect. Sometimes use 1/2 white whole wheat. I love to wrap and freeze 3 together. Thaw them, butter and brown to use for sliders flat side down on griddle. Many thanks for such a nice recipe!
Correct me if I’m wrong, but another point to remember is that Kosher salt is less dense, so replacing, say, 2 tsp of kosher salt with 2 tsp table salt would result in a saltier dish. At least, that’s what [competing website redacted 🙂 ] said.
You’re absolutely correct, but it’s more than that – the brand makes a difference too!
A tablespoon of Diamond Crystal Kosher Salt is less salty-tasting than a tablespoon of Morton’s Kosher Salt, for example. The ratio I was taught was 1:1.5:2 (i.e. to substitute a tablespoon of fine-ground salt, use 1.5 tablespoons of Morton Kosher Salt or 2 tablespoons of Diamond Crystal Kosher Salt).
Chill out dude
I don’t know if I missed this, but what would be the best way to store the buns? And how long should they last? Thank you!