
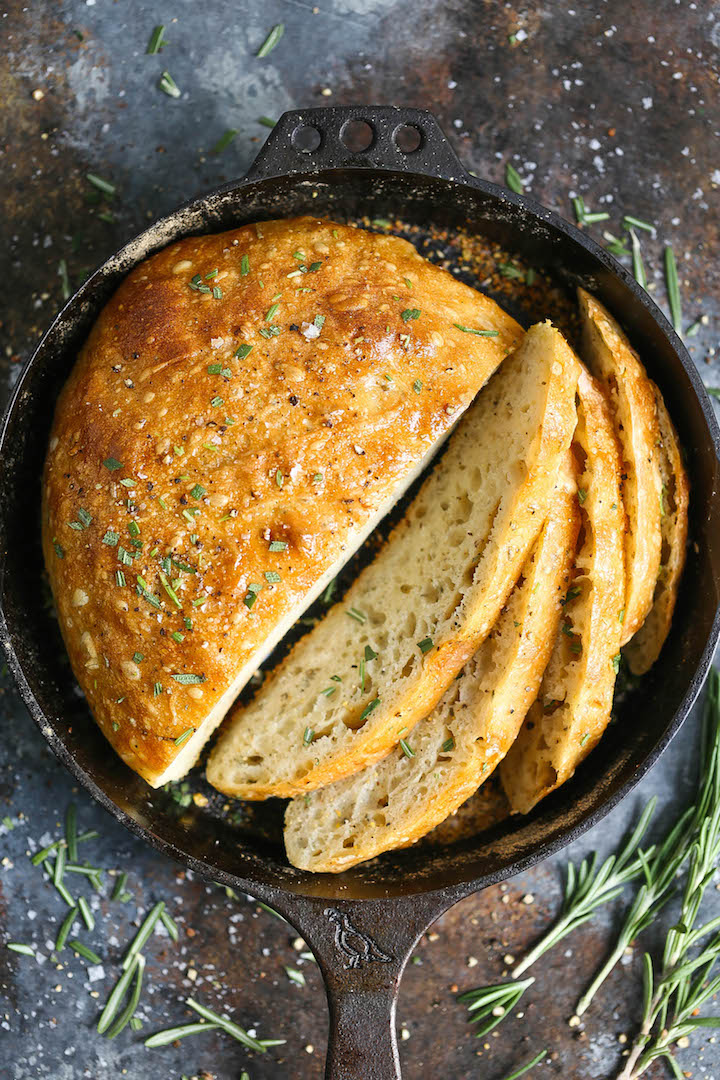
No Knead Rosemary Bread
This post may contain affiliate links. Please see our privacy policy for details.

A basic, FOOLPROOF homemade bread recipe here! Anyone can make this! And the bread comes out just perfect!
Featured Comment
Bread making has been my jam lately. Sometimes it can take hours and hours on end, but this one here takes just over 24 hours. But, guys, it’s only 15 minutes of hands-on prep work (if that). Then you just let the yeast do its thing in all of its bread glory.
reasons to make no knead rosemary bread
- This really is a no knead recipe. That means less work, less effort. Perfect for beginners and home bakers.
- Does not require anything fancy. No mixer, no bread machine, no starter needed here.
- Great for dunking and sopping. Homemade bread can and should be served warm with all the butter, but really, let’s dunk and sop up all the cozy soups.
dutch oven bread versus skillet bread
Dutch oven bread
A Dutch oven bread is baked with a tight-fitting lid for a crispier crust, similar to that classic artisan bread texture.
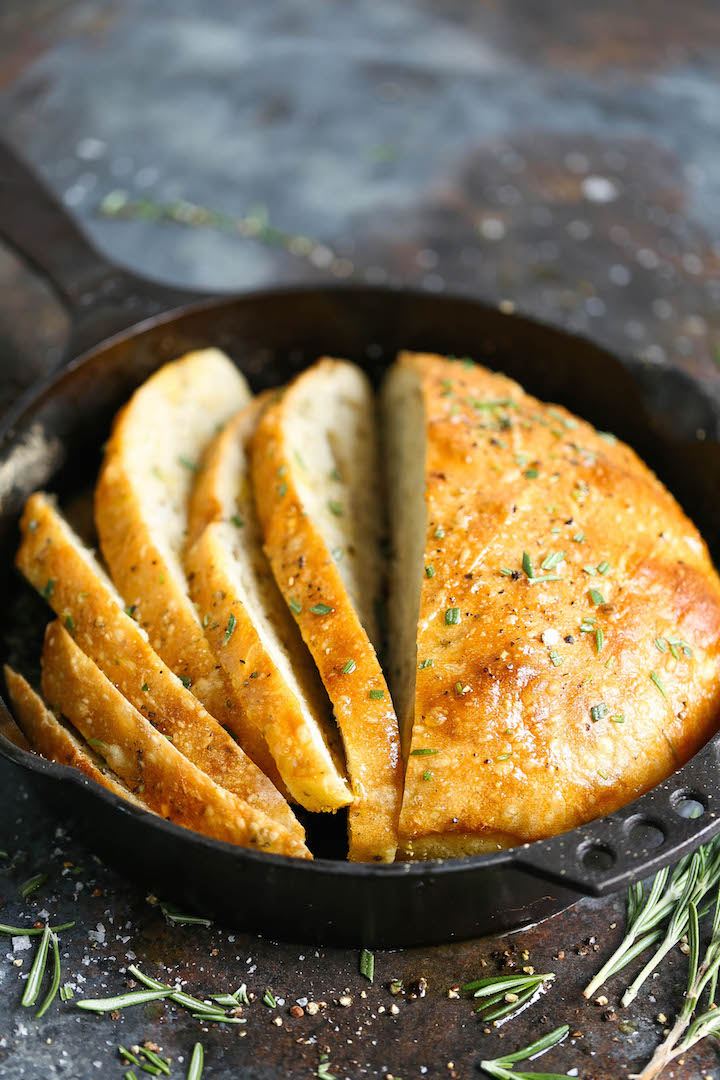
Skillet bread
A skillet bread is not covered and will yield a more softer crust. The bread will also be a little flatter in shape than a Dutch oven bread due to its shallow depth.
tips and tricks for success
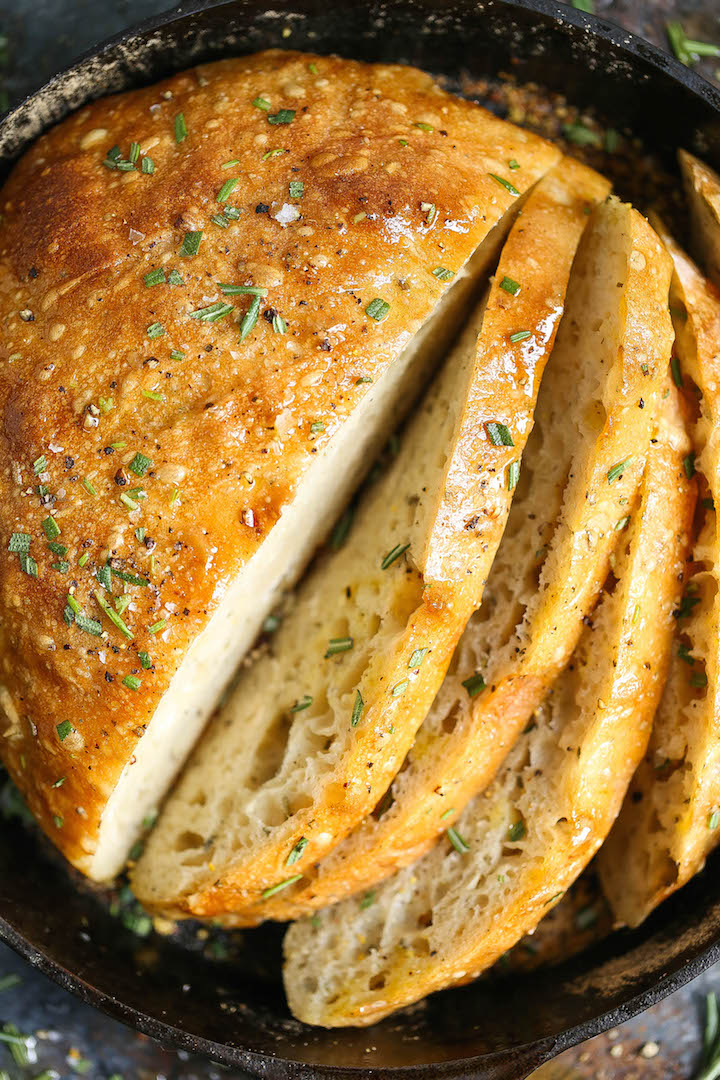
- Use a cast iron skillet. A cast iron skillet heats evenly and retains heat very well, yielding a much nicer crust than using a traditional baking pan.
- Check for expired yeast. When using expired yeast, the bread will not rise well, resulting in flat, dense bread.
- Use cornmeal. As the dough will be a bit sticky, the cornmeal will help prevent any sticking to the bottom of the skillet.
- A sticky dough is great. Stickiness is actually ideal here, adding just enough flour to work the dough into a round shape. High humidity can also affect the dough’s texture, making the dough even stickier than usual.
- Mix it up. Add leftover fresh herbs such as thyme, rosemary or sage, roasted garlic or freshly grated Parmesan cheese.
- Freeze as needed. Once cooled completely, cover the bread tightly with plastic wrap, then aluminum foil, freezing up to 3 months.
what to serve with no knead bread
Tools For This Recipe
10-inch cast iron skillet
No Knead Rosemary Bread: Frequently Asked Questions
A Dutch oven or oven-safe baking pan can be used instead.
1 cup of all-purpose flour can be substituted for whole wheat flour, keeping the rest of the recipe the same.
Absolutely! But because dried herbs are often more potent/concentrated than fresh herbs, you need less when using dry. The correct ratio is 1 tablespoon fresh herbs to 1 teaspoon dried herbs
Leftovers can be stored in an airtight container at room temperature for 2-3 days.
Yes! Once cooled completely, cover the bread tightly with plastic wrap, then aluminum foil. Label, date and freeze up to 3 months.
No Knead Rosemary Bread
Video
Ingredients
- 3 cups all-purpose flour
- 3 cloves garlic, minced
- 1 tablespoon finely chopped fresh rosemary, or more, to taste
- 1 ¼ teaspoons kosher salt
- ¾ teaspoon freshly ground black pepper
- ½ teaspoon instant yeast
- 1 ½ cups water, at room temperature
- 2 tablespoons cornmeal
Instructions
- In a large bowl, combine flour, garlic, rosemary, salt, pepper and yeast.
- Using a wooden spoon or your hand, add water and mix until a wet, sticky dough forms, about 30 seconds.
- Cover bowl tightly with plastic wrap and let stand at room temperature until surface is dotted with bubbles, about 18 to 24 hours.
- Lightly oil a 10-inch cast iron skillet or coat with nonstick spray; sprinkle with cornmeal.
- Working on a lightly floured surface, gently shape dough into a round.
- Place dough into the prepared skillet. Cover with a clean dishtowel and let stand at room temperature until dough has doubled in size and does not readily spring back when poked with a finger, about 2 hours.
- Preheat oven to 450 degrees F. Place into oven and bake until golden brown, about 30-40 minutes.
- Serve warm.
Equipment

Did you make this recipe?
Tag @damn_delicious on Instagram and hashtag it #damndelicious!
I followed the recipe exactly. The dough was extremely wet and sticky. I let it sit for eighteen hours. It developed plenty of bubbles, but barely rose, instead spreading out to the very sides of the cast-iron dutch oven. I could not then shape it into a ball because it was still too wet. I let it sit another several hours in a warm place. It did not rise much or develop more bubbles. It did not rise in the oven, and made a big mess on the sides of my cast-iron dutch oven. The dough baked, somewhat. The crumb was slightly rubbery but full of air pockets, and the flavor was excellent. My yeast was good– I bake with that yeast often. I wish I knew why this recipe did not work for me.
Great recipe for first time making it. The flavour was awesome, however density was not as light as I’d like. That’s on me!!! However it did turn out beautifully, in fact picture perfect!!!
How did you get the glossy finish on the bread? Thanks
Can I use rye flour and add caraway seeds?
Can this bread recipe be made gluten free?
I made this using the directions but 2 T of fresh rosemary. Wow. It is AMAZING!
This is truly amazingly delicious bread ! Thank you for sharing this crowd pleaser.
Made this bread today and we thought it was delicious! Personally, I would use less rosemary, but that different for everyone. I liked the comment about adding thyme, red chili flakes and cheese. I’ll try that next.
My loaf looks like the one in the picture (although the pic looks like it was basted with butter and sprinkled with rosemary too). We sliced while warm so slicing through was a little harder because the crust was truly crusty.
We will definitely make again.
Just tried this today… absolutely delish with some salted butter! Just the right amount of garlic and rosemary. Definitely a keeper, thank you.
Can I bake in a Dutch oven? If so for how long? Thanks
I did this in a dutch oven… lid on for 20mins then lid off for another 10mins. Came out perfect! But I did pre-heat the dutch oven as well.
Best bread ever! It truly is fool proof and so delish! It is now a staple in our family.
I’m already baking my second loaf! I didn’t have a Dutch oven so seeing this recipe used a cast iron was perfect. I loaded the dough up with red pepper flakes, thyme, rosemary, Italian seasoning, and shredded cheese and holy cow— the people want more. I love how easy this recipe is. So yummy.
I made this according to directions : used rapid rise instant yeast.
After 24 hours I had bubbles, when I transferred it to working area it was very wet and I was unable to form it into a ball. The dough did not double in size after 2 hours. I went ahead and baked it, never rose, after 40 minutes it still wasn’t cooked in the middle. . I was so excited to make my own bread. Any suggestions where I went wrong?
Yeah – I’ve had problems too – it has to be the yeast. Make sure not only the check the expiration date of the yeast but Proof the yeast too to make sure it’s active – google how to do that. And if your dough was very wet, then add more flour about 1/4 cup at a time I’d say till it holds together, athough Damn Delicious says sticky dough is fine for this recipe. How humid your kitchen is affects things as well as your altitute. Hope this helps!
Someone asked for clarification about the rapid rise yeast. The recipe does not call for rapid rise yeast. Am I missing something?
In reply to the first reviews Chungah said she used “active rapid rise dry yeast”.
Help! I have made this bread twice and neither time could I get the dough to rise. I just don’t get it. The second time I did use the rapid rise yeast. Is 1/2 teaspoon enough? It smells so good while it’s baking, but it’s just so flat. Any help or ideas would be greatly appreciated. Thanks. Terry
I made this today. It looked like naan. Never rose. I was so disappointed, BUT I notice someone commented on rapid rise yeast. I used instant active. That could have been the issue. However, the dough was rather “soupy” as well. I used the recommened amount of water. Too much? I’m going to give it another shot, just looking for some clarification. Thanks
any ideas on the nutritional content of this bread?
Best ever!!
This bread is so easy and delicious! I’ve tried several different variations of herbs and even added cinnamon and raisin. Yummy every time!
I followed the recipe exactly, minus the cast iron. I did mine in a Dutch oven. I liked the flavors, however I would probably lower slightly the amount of garlic. I roasted my garlic cloves in the oven and freshly minced them which produced a very robust flavor.
However, my loaf came out flat and didn’t seem to rise in the oven, despite rising during both proves. I think it tasted good, but I’d love it to be more airy on the inside and less dense. Any thoughts? Less water maybe or more yeast? I would definitely use the same flavors, but maybe try a different loaf for more airiness.