Instant Pot Rotisserie Chicken
This post may contain affiliate links. Please see our privacy policy for details.
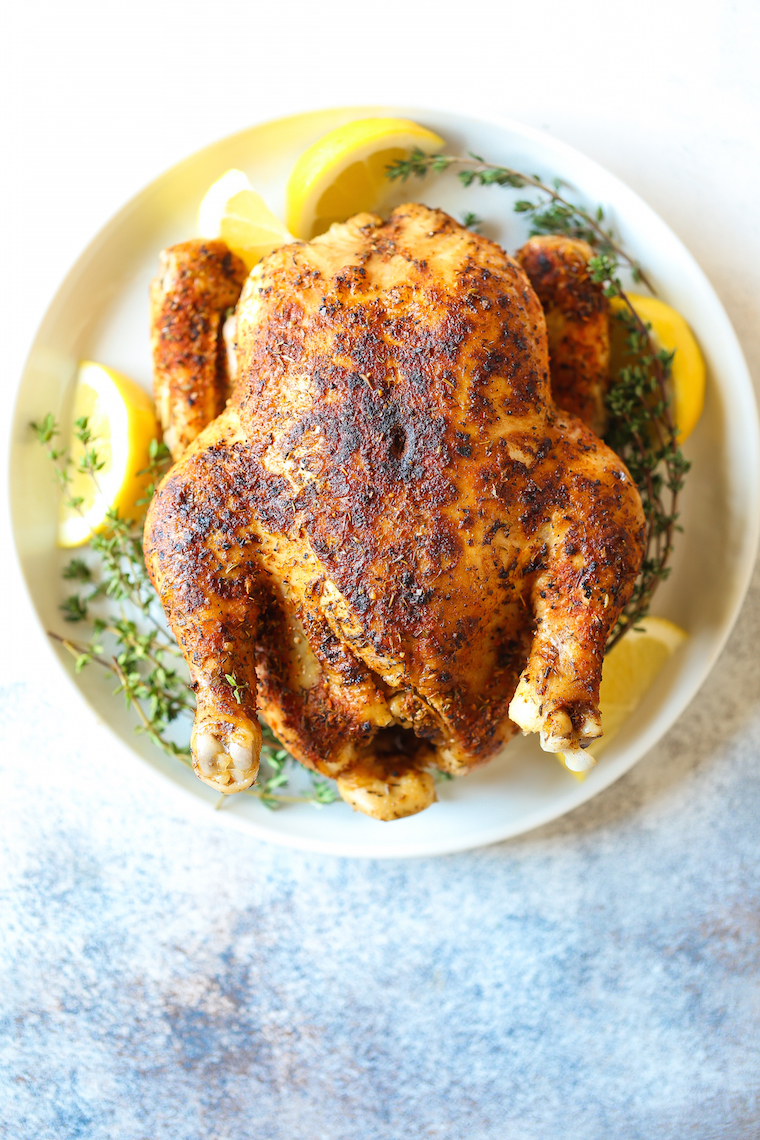
28 min whole rotisserie chicken? Yes! The chicken comes out perfectly tender, juicy + packed with flavor. And it’s SO EASY!
Featured Comment
Also, it just tastes better with one’s own seasoning. We end up eating all of our chicken (whereas with the one from the store, the dogs get snacks off of it for a few days – it’s tasteless on the second day).
THIS chicken (prepared almost exactly as here – sometimes I vary the seasonings and use garlic in the broth).
I love a good rotisserie chicken. I mean, I really love a good rotisserie chicken. It’s so versatile, and has so many uses. It’s great on its own with a few roasted veggies and it’s great with pastas and soups as a fill in for even quicker dinners.
why i love this recipe
- Yields the most tender, juicy and flavorful rotisserie chicken
- Requires minimal prep, pantry staples and zero babysitting
- Natural release of the Instant Pot gives you time to prep your side dishes
- Freezer-friendly, perfect to freeze whole, in pieces or shredded
tips and tricks for success
- Use good-quality stock. The better quality your stock, the better your chicken. Many brands love to pack in the salt so always opt for unsalted or a lower-sodium variety. Homemade stock is even better.
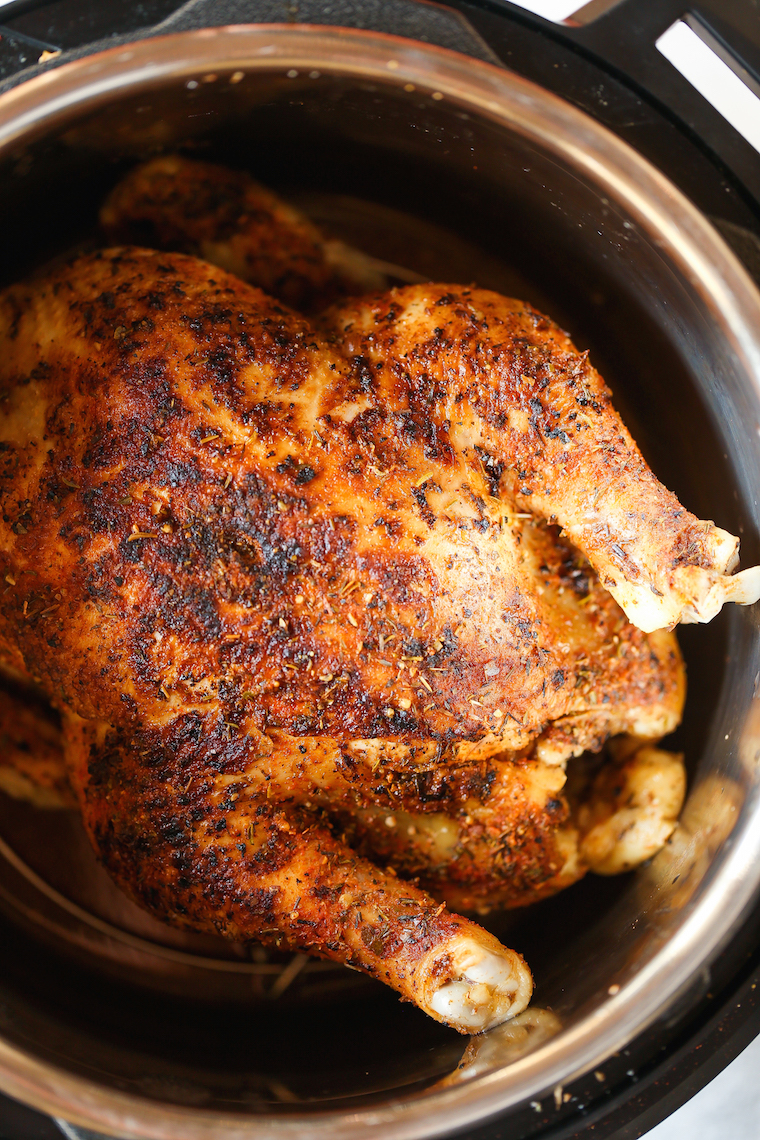
- Don’t skip the metal trivet. After browning the chicken, place the chicken on top of the metal trivet. This will help ensure that the chicken does not burn, as well as providing better circulation for even cooking throughout.
- Lift the trivet to remove the chicken. The chicken will be very fall-off-the-bone tender (quite literally). Working carefully, lift the trivet to remove the chicken from the Instant Pot and serve.
- Use an instant-read thermometer for the most accurate results. The internal temperature should reach 165°F, inserting through the thickest part of the thigh between the breast and leg but avoiding the bone.
- Broil for crispy skin. As an optional step, broil the chicken on a sheet pan until desired crispness is reached, about 3-5 minutes.
- Let your chicken rest. Let your chicken rest for at least 5-10 minutes prior to serving, allowing the juices to redistribute – this will allow for maximum flavor and juiciness.
- Save the chicken bones. Repurpose the leftover chicken bones for homemade stock.
what to serve with instant pot rotisserie chicken
Tools For This Recipe
6-qt Instant Pot®
Instant Pot Rotisserie Chicken: Frequently Asked Questions
The metal trivet helps elevate the chicken from the bottom of the Instant Pot, ensuring even cooking and avoiding the dreaded “burn” error.
Place the chicken back in the Instant Pot, cooking for an additional 2 minutes for every 5 degrees below 165°F.
Yes! But be sure to increase the chicken stock to 1.5 cups.
Leftovers can be stored in an airtight container in the fridge for 3-4 days.
Yes! Rotisserie chicken is very freezer-friendly and can be frozen whole, in pieces or shredded in plastic freezer bags. Label, date and freeze up to 3 months.
Instant Pot Rotisserie Chicken
Ingredients
- 2 teaspoons kosher salt
- 1 teaspoon freshly ground black pepper
- 2 teaspoons dried thyme
- 1 ½ teaspoons paprika
- 1 teaspoon dried oregano
- 1 teaspoon onion powder
- ½ teaspoon garlic powder
- 1 (4-pound) whole roasting chicken
- 1 lemon, halved
- 2 tablespoons canola oil
- 1 cup chicken stock
Equipment
Instructions
- In a small bowl, combine salt, pepper, thyme, paprika, oregano, onion powder and garlic powder.
- Remove giblets and excess fat from the chicken cavity. Dry chicken thoroughly with paper towels. Season chicken and chicken cavity with salt mixture. Stuff cavity with lemon.
- Set 6-qt Instant Pot® to the high saute setting. Add canola oil and chicken, breast side down, and cook until evenly golden brown, about 4-5 minutes. Using tongs, flip, and cook for an additional 4 minutes; set aside.
- Place metal trivet into the pot and add chicken stock. Gently place chicken on top of the trivet. Select manual setting; adjust pressure to high, and set time for 28 minutes. When finished cooking, naturally release pressure according to manufacturer’s directions, about 20-30 minutes. Let rest 10-15 minutes.
- Serve immediately.
Video
Did you make this recipe?
Tag @damn_delicious on Instagram and hashtag it #damndelicious!








If I don’t care about the skin being crispy, is there a point to searing it first?
I haven’t made this yet, but for three solid years I use this website to make my family’s weekly meals. Every single one has come out superb and has majorly changed my cooking game! Thabn you.
I don’t have a trivet. Can I still make this chicken in the IP??
I’m surprised no one has responded yet, you can improvise with canning rings or make balls of aluminum foil for the chicken to rest on.
I have a 6lb bird what time changes should I make?
Excellent. So easy and yum. I’ve used the recipe several times. Usually use a 5 lb chicken and don’t make any changes. It’s great to make ahead and use the chicken in other recipes.
Made many times great/easy
This is so good and easy! Thank you
Great recipe, use monthly. Anyone know nutritional values for this bird, particularly calories? Or if maybe it’s posted somewhere? Thanks for the recipe!
Can it be done in pieces?
Have my second chicken cooking. Delicious and simple, thank you!
I used kitchen twine to tie around the chicken and keep it more secure & compact. It made it easier to turn & sear the chicken at the start & made it easier to remove the chicken from the pot!
Followed the recipe exactly! Perfect, concise and clear instructions. Came out perfect. This one is a keeper! Thank you!
best recipe ive tried
Delicious… also, it take 45+ minutes to release pressure normally. You’re looking at an easy 1hr 30min when you make this. Keep that in mind.
As stated at the top of the recipe
I love that the chicken stays so juicy! I found that it was super easy to turn the chicken and take it out to put the trivet in wearing the rubber gloves I use for washing dishes. No problem at all! (I wash my hands with the gloves on to get the yuck off.) I don’t eat the skin so took the advice of another reviewer and added some pats of butter and herb mix under the skin.
Such an uncomplicated recipe with great results.
I made this tonight and my husband said “this is the best roasted chicken he has ever had”. It was so moist and fell right off the bone.
My go-to recipe! After the 8th or 9th time using this recipe I got the brainstorm to triple the seasoning mixture, use a 1/3 and store the rest in a glass spice shaker jar for later use. Saves even more time than this already time-saving recipe takes.
Brilliant! I’m using this!
The value of the instant pot is that the chicken stays moist – unlike many actual rotisserie chiecksn (from the store). We have a rotisserie but that is a REAL pain to use.
Also, it just tastes better with one’s own seasoning. We end up eating all of our chicken (whereas with the one from the store, the dogs get snacks off of it for a few days – it’s tasteless on the second day).
THIS chicken (prepared almost exactly as here – sometimes I vary the seasonings and use garlic in the broth).
Has anyone made this with just chicken breast and thighs instead of a whole chicken? Instructions??
I guess I’m still trying to figure out the allure of the Instant Pot. It seems that when you factor in the time needed to brown both sides (4-5 minutes didn’t do the job), then wait to build up steam, then time to cook and release its steam naturally, there is little time savings. The estimated total time from start to finish is an hour and a half. Unless I’m missing something, I don’t see the time savings.
If I had a 4 lb. chicken, I would probably spatchock it and cook it on my grill. This would take about an hour or so. The skin would be crisp and the meat would be juicy from roasting/grilling.
My wife picked up an oven stuffer chicken, it was about 7 lbs. There was no time to cook it in the oven, so I decided to try this recipe. Due to its size, I increased the cook time to 45 minutes. The chicken barely fit into my pot.
I used a wood spatula inserted into the cavity to pull the bird from the pot, but the legs and thighs just stayed in the pot. I let it cool down a bit, but it was still not firm enough for slicing. My wife thought the meat was dried out; maybe I should have let it cool down a bit more before slicing. Bonus points for the seasoning, it was spot on and I would absolutely use it again when grilling.
We have a ton leftover, so I think we will make fajita’s tonight. Maybe make some black beans in the instant pot.
My allure for the instant pot is that I have three little kids and it’s minimal effort to make the chicken, just set it up & sear it, shut the lid and see ya! ✌ I have made this a lot of times and really like the recipe!
I agree with you on that Jimbo. I don’t fully see how an instant pot saves time for most recipes I have done, however, my appeal is not having to turn the oven on! I live in an apartment, so that helps a lot!
While the Instant Pot doesn’t always save much time in terms of the overall time it takes to cook something (although that depends what you’re making, for instance bone broth is cut from an overnight simmer to 2 hours), what it does save is “hands on” time. You just set it and forget it, and you can get on with other things without having to monitor it at all. So it frees up time and mental space for other things.
There are also some other benefits, for instance if you cook something like dried beans under pressure they actually become more nutritious and easier to digest, as the cooking process neutralises more of the antinutrients and indigestible substances (e.g. lectins, phytates & complex sugars).
As for your issue with your chicken falling apart and being too dry, I suspect your problem may have been your change to the timing – when cooking a larger item in the Instant Pot you don’t always need to increase the time (or only need to increase it a little bit) as it takes longer for the pot to come to pressure and depressurise, which increases the overall time anyway.
The allure for me is saved effort. With chronic health conditions, I often have to weigh how hungry I am against the effort making food will take. If it wasn’t for my instant pot, I’d often just starve, or eat fast food which only adds to my issues.
I’m shocked how easy this was and the flavours were amazing. !
Love this recipe – flavor and so juicy.